1. Using the @Controller Stereotype
This is the simplest way to create a controller class that can handle one or multiple requests. Just by annotating a class with the @Controller stereotype, for example:
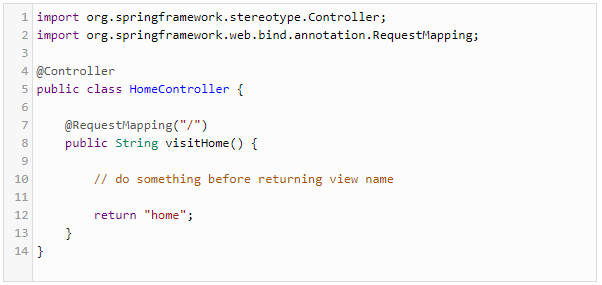
As you can see, the visitHome() method handles requests coming to the application’s context path (/) by redirecting to the view named home.
NOTE: the @Controller stereotype can only be used when annotation-driven is enabled in Spring’s configuration file:

When annotation-driven is enabled, the Spring container automatically scans for classes under the package specified in the following statement:

The classes annotated by the @Controller annotation are configured as controllers. This is most preferable because of its simplicity: There’s no need to declare beans for controllers in the configuration file.
NOTE: By using the @Controller annotation, you can have a multi-actions controller class that is able to serve multiple different requests. For example:
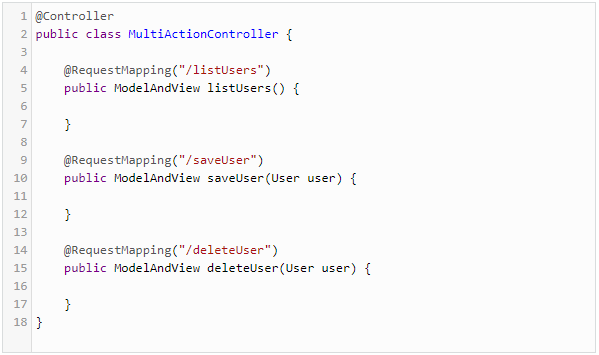
As you can see in the above controller class, there are three handler methods that process three different requests /listUsers, /saveUser, and /deleteUser, respectively.
2. Implementing the Controller Interface
Another (and maybe classic) way of creating a controller in Spring MVC is having a class implement the Controller interface. For example:

The implementing class must override the handleRequest() method, which will be invoked by the Spring dispatcher servlet when a matching request comes in. The request URL pattern handled by this controller is defined in the Spring’s context configuration file as follows:

However, a drawback of this approach is that the controller class cannot handle multiple request URLs.